More Lure/Reward Training
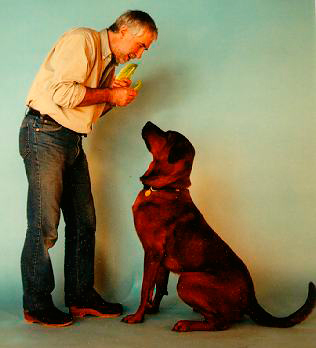
LURE/REWARD TRAINING
The science of lure/reward training is pure and simple —as simple, in fact, as 1–2–3–4:
1. Request
2. Lure,
3. Response
4. Reward.
For example: 1. Say, “Sit,” 2. Lure the dog to sit by moving a food lure upwards in front of the dog’s nose, so that 3. As the dog raises his head to follow the food, he compensates by lowering his rump to the ground and sits — the desired Response and so, 4. Reward the dog with a scratch behind his ear, by throwing Tennis Tug ball to retrieve, or simply just give him the food.
Anyone may master the science of lure/reward training within seconds. However, it can take a lifetime to master the art. The art of lure/reward training comprises creating and compiling an exhaustive repertoire of innovative techniques to lure an animal to quickly and voluntarily perform the desired response, so that the animal may be requested to do so beforehand and immediately rewarded for doing so afterwards.
Lure/reward training may be used to quickly and easily teach your dog:
Body position changes — sit, down (sphinx, bang, side, settle), stand, rollover, beg, bow, bang, etc.,
Stays — sit-stay, down-stay (both prone and supine) and stand-stay,
Actions — heeling, jumping, backing up, walking backwards, walking on hind legs, doggy dancing and woofing and shushing on cue
Position Changes & Stays
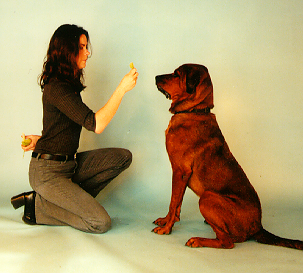
Once you have used all-or-none reward training techniques to teach your dog to sit- and down-stay, to pay attention, to walk on leash and not to touch, you will find that your dog is now so much calmer and that you have regained his attention. Now it is again possible to use the lure/reward training techniques that worked so well in puppyhood.
Lure/Reward training is the fastest pet dog training technique to teach your dog the meaning of the instructions you use. There is no need to spend time shaping behavior. The dog is lured to perform the desired behavior on the very first trial. Consequently, the dog may also start forming an association between the command and the relevant desired behavior from the very first trial. Lure/Reward training position changes has been described in some detail in the Puppy Training chapter, Lure/Reward Training and so please go back and review that section.
The science of lure/reward training is simple and comprises a four-step process:
1. Request, 2. Lure, 3. Response, 4. Reward
When this sequence is repeated a number of times, the reward will reinforce the desired behavior which will increase in frequency and also, the reward will reinforce the associations between the Request and the Lure-movement (handsignal) and between the Lure and the relevant Response. Your dog will quickly learn to respond correctly to your handsignals, because dogs commonly communicate by body language. However, it will take a long time for your dog to learn to respond reliably to verbal commands.
The art of lure/reward training focuses on discovering the best way to immediately lure the dog to voluntarily perform the desired behavior. Food makes the best lure for initial training (at home and in puppy class) but toy lures are better for adolescent and adult dogs. Use chewtoys, squeakies, tennis balls, Frisbees, and tug o’ war toys to play-train your dog.
Once your dog is focused on the lure, he will follow any lure-movement with his nose, eyes, and ears. If he moves his nose, his head will move. If he moves his head and neck , his whole body will move. So to lure a dog to sit, move the lure upwards over his head. To get a dog to lie down, lower the lure to the ground between his front paws. To lure a dog to stand, move the lure away from his muzzle.
A cardinal rule in dog training is to always work with a minimum of three commands, so that the dog cannot anticipate the next command (as often happens when training for obedience competition). For example, if you always teach sit-stay before a recall, soon the words “Sit-Stay” will come to mean “ready… steady… GO!” and the stay will break down. On the other hand if you work with “Sit,” “Down” and “Come Here” at the same time, the dog can never predict the next command but has to wait for you to say it and so, learns to pay greater attention. If he is in a sit, he doesn’t know whether the next command will be “Down” or “Come Here.”
Anticipation is very dangerous. You do not want your dog to rush off when you say “Good Dog” but he will do if you have always said, “Go Play” immediately after praising your dog “Good Dog.” Because he now thinks that “Good Dog” means “Go Play.”
When teaching position changes, always work with three positions at the same time, for example sit, down and stand. Ask the dog to move from one body position to another. Randomize the order of the body positions. You will soon realize, that you are not simply teaching yourdog three body positions, but rather you are teaching six different body positions changes. For example, you are teaching your dog to both sit from stand (very easy) but also to sit up from the down (harder). Also, you are teaching your dog to lie down from the sit (easy) and lie down from the stand (much harder). And of course, very few people teach their dogs to stand, which means that the sit and down will be sloppy and unreliable too, because the owner is only yo-yoing the dog between two body positions. And so the dog learns, “If I am sitting, then whatever they say, I’ll lie down.” And so the dog never learns that he must listen to whatever you say.
Japan offers a wonderful exception. Dogs in Japan have the very best stand-stays because after returning home from a walk their owners instruct their dogs to stand for several minutes while they clean their dogs paws before allowing them to go inside.
To test that your dog comprehends verbal instructions for all six body position changes, take one step back from your dog and ask him to come and…
“Sit-Down-Sit-Stand-Down-Stand.”
Go for a walk and every 25 yards ask your dog to perform the S-D-S-St-D-St sequence. After just one walk, he will become extremely reliable. Reliability is important. If your dog follows your instructions, you will not become frustrated or angry and your dog will not be reprimanded or punished.
Once your dog performs random position changes quickly and reliably, praise him for longer and longer (count out the time in “good dogs”) in each position before offering him a food reward. Now, you may be able to practice random length stays in each body position. Keep track of your dog’s record length stays in each position so that you can try to beat your personal best during the next training session.
Now it’s time to teach your dog other body position changes, such as, Down on-Side, Supine-Down, Beg, Bow, Creep, Roll Over etc.
Distance Position Changes
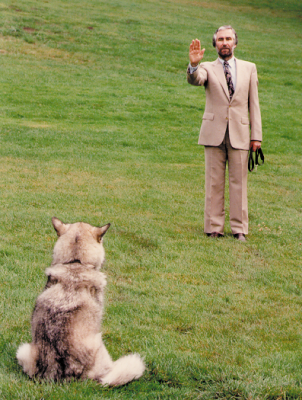
Even though you think your dog sits fairly reliably, he probably will not sit if he is at a distance. In fact he probably will not sit if there is any variation in the training scenario. If you turn your back on him and ask him to sit, he probably won’t. If you lie on your back and ask him to sit, he probably won’t. If you ask him to sit in heel position as you continue walking, he probably won’t. But don’t worry, your dog is not being disobedient. Rather, like all dogs, he is an extremely fine discriminator and has only learned precisely what you have taught him — to sit if he is right in front of you, or if he is by your side in heel position. So, you need to teach him to sit in every possible situation and especially, if he is at a distance and distracted.
The dog’s failure to comprehend is difficult for owners to understand at first but teaching dogs is very different from teaching people. A person will generalize from one training scenario to all others, whereas a dog only learns exactly what you teach him. To teach a dog to sit in every possible situation, he needs to be trained to sit in every possible situation.
Before you can teach distance commands, you must make sure that your dog’s verbal comprehension is at least 90% reliable when he is right next to you. Why? Well, if your dog does not sit promptly and reliably when verbally instructed to do so when standing right in front of you and staring at your face, what makes you think he would sit when forty yards away and chasing a squirrel or charging another dog. When your dog is running away from you, or even when his head his turned, he cannot see your handsignals or body language (which are really easy for him to understand) and so, verbal commands are the only way to get him to respond. So, first you must check that your dog understands verbal commands when he is close to you before expecting him to respond to verbal commands at a distance.
And why should we bother teaching distance commands? Well, because when an owner has reliable distance control over their dog, the dog may now enjoy a quantum leap in terms of quality of life. The dog need no longer be confined when family and friends visit the house and the dog may be allowed off-leash in dog parks and on walks in safe areas, because the owner is secure in the knowledge, that the dog will sit when requested to do so. And let’s think about it; sitting promptly when requested will prevent or resolve pretty much every behavior problems there is. A dog cannot jump up, chase cats, chase his tail, or run off if he is sitting. (See Sit List) This is why teaching your dog an emergency distance command is so important.
So first, let’s check how well your dog understands proximal verbal commands. Go for a short walk and every 10 yards verbally instruct your dog to perform a S-D-S-St-D-St sequence until you have completed 20 sequences. Use verbal commands only; no handsignals or unintentional body language. Keep track of how many verbal commands are required before your dog responds with the correct body position change. Maybe have somebody film this exercise so that you may accurately score your dog’s performance afterwards. Then for each position change, e.g., Down from Stand, divide the number of position changes (20) by the number of verbal “Down” commands that you gave, multiply the number by 100 and this gives you the percentage reliability for this verbal command. For example if you said “Down” 43 times to get your dog to lie down on the 20 attempts, then your percentage reliability is 20/43 x 100 = 47%. Not good enough yet, so keep practicing. Once your dog’s reliability exceeds 90%, we can easily teach him distance commands.
Once your dog has a good comprehension of proximal commands, we can now teach distance commands. When teaching new and additional commands, the sequence is always the same — we follow the new (unknown) command (the one we are trying to teach) by the old (known) command, which serves as a verbal lure to prompt the desired response. In this instance, first we ask the dog to sit from a distance and then immediately afterwards we ask the dog to sit from close up. Because the two commands always occur in the same order, the dog learns to anticipate, or predict, the known proximal command every time he hears the unknown distal command. So, after a few trials he begins to respond as soon as he hears the distal command.
Ask your dog to “Down-Stay,” take one step back and then say, “Sit.” If he sits, praise him profusely and offer a couple of treats. If he does not sit within a second, quickly step back to stand toe-to-toe in front of your dog and say, “Sit.” This time he will probably respond. Praise and offer a piece of kibble. Now take a step back with him in a sit-stay and this time instruct him, “Down.” Praise and reward him profusely if he responds correctly and if not, simply step back and ask him to lie down again.
Please remember, he is not being dumb or disobedient, he just doesn’t understand distance commands yet. But after just six to eight pairings of the distance command followed by the proximal command, he will soon start to respond as soon as he hears the distance command. Now training speeds up and you will find he quickly learns to sit when you give the instruction from two yards away, then three yards, then five, ten, twenty, and so on.
To get your dog used to working in different environments, first practice with your dog off-leash indoors, in your yard and in friends’ yards. When on walks, practice asking your dog to sit when he is at the end of his leash. Then practice with your dog on a long line, or Flexi Leash. Now, you are ready to practice with your dog off-leash in dog parks and other safe areas.
Stay Proofing
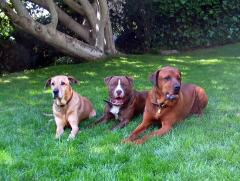
When you have a lightning-quick emergency Sit plus a rock-solid unbreakable Sit-Stay, you have a pretty well-trained dog that will have a better quality of life because people will welcome his integration into the social scene.
Proofing stays comprises increasing duration, distance, and distractions. Start by teaching short stays simply by delaying the food reward after a position change and counting out time in “good dogs” — “good dog one, good dog two, good dog three etc.” Alternate periods of instructive feedback — "Good Sit-Stay Rover" — with short periods of silent appreciation. With each successive trial, gradually decrease the amount of praise and increase the length of silence.
Most dogs will give you lots of warning that they are about to break the stay; first they look away, then they sniff away, and then they go away. So, if your dog looks away from you, or if he even looks like he is about to break a sit-stay, for example, simply re-instruct your dog, “Rover, Sit!” No need to shout, but do create a sense of urgency and quickly get your dog sitting again. Even though he has moved out of body position, do not give him time to move from the spot. Get him back sitting as quickly as possible and praise him as soon as he sits again. Only use your voice as an instructive reprimand. Never use your hands to re-position your dog, otherwise it will be a longtime before you have any distance control over your dog.
Always train with a stopwatch, so you have a good objective grasp of your dog’s reliability. Remember, to practice at least three types of stay — sit-stay, down-stay and stand-stay. Do not forget stand-stays. You will find that the more you practice stand-stays, the more rock-solid your dog’s sit- and down-stays. Practice standing toe-to-toe in front of your dog, until your dog comfortably performs a 30 second stand-stay, a one-minute sit-stay and a three-minute sown-stay.
Now it’s time to gradually and progressively increase distance. Take one step back and after just one second return to your dog and praise him. After every successful short proofing episode, always return to the toe-to-toe position and praise your dog to “capture” the stay. Then take two steps back and after two seconds return to your dog and praise. Then take three steps back and after three seconds return to your dog and praise. With each successive trial, gradually increase the distance. Should your dog look like he is about to break, immediately re-instruct him to “Sit.” This is why we taught distance position changes before teaching stays. Unless you have an arm like Inspector Gadget, verbal commands are the only way to immediately correct and reposition your dog at a distance.
Now it’s time to gradually and progressively increase distractions. Of course by increasing the distance and distractions in this fashion, the cumulative duration will increase dramatically. First we to get the dog used to silly and unexpected things that we do. Most dogs will break a stay if the owner simply gets down on the ground and rolls over. This is not good enough. We want the dog to reliably stay when around children and children spend a lot of time jumping, skipping, shouting and rolling on the floor. So, let’s gradually proof the dog to stay when we move slowly, quickly, when we jump, clap our hands, laugh, sing, and perform all sorts of silly walks and actions. Remember, after each incremental proofing episode, return to your dog and praise. After thirty minutes or so, your dog should be able to remain in a sit-stay while you kneel down, approach your dog on all fours, kiss him on his nose, rollover, waggle your arms and legs in the air, squeak, and then stand up to return to your dog and praise.
Now comes the fun part, you are going to praise your dog for staying, while other people try to get your dog to break. Check out Musical Chairs competition in the K9 GAMES.
Heel On-Leash
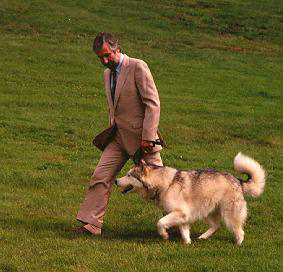
Teaching your dog to heel has been described in some detail in the Puppy Training chapter, Lure/Reward Training and so please go back and review that section. Here, we shall present some additional tips.
Use food or toys in your left hand to lure your dog to heel on your left side. Each time before stopping, use your right arm (across the front of your body) to signal your dog to sit by your left side.
Practice short sit-heel-sit sequences in a straight line, then practice turns in place — sit-turn-sit and eventually, turns in motion. Slow down your dog (move your left hand lure backwards) before turning left but speed up your dog (move your left hand lure forward) before turning right.
It is really important to teach your dog to slow down (Steady) and to speed up (Hustle) on command. Forging ahead and lagging behind are the two major problems when heeling and of course, each is the antidote for the other. By teaching your dog to slow down and speed up on command you can prevent a lot of tight-leash walking and leash-jerks.
To teach your dog to slow down. Walk at a fast or normal pace and 1. Say, “Steady” 2. Immediately and dramatically reduce your speed so that 3. Your dog slows down to accommodate to your change in pace, and 4. Praise your dog. After half a dozen or so repetitions, your dog will anticipate that you are about to slow down whenever he hears you say, “Steady” and so, your dog learns that Steady means slow down.
To teach your dog to speed up: Walk at a slow or normal pace and 1. Say, “Hustle” 2. Immediately and dramatically increase your speed so that 3. Your dog speeds up to accommodate, and 4. Praise your dog. After half a dozen or so repetitions, your dog will anticipate that you are about to speed up whenever he hears you say, “Hustle” and so, your dog learns that Hustle means speed up.
Practice by frequently and randomly changing gears between fast, normal and slow when walking your dog in a straight line on sidewalks. Once you have taught your dog Hustle and Steady, walking your dog on leash will be so much more enjoyable for you, and for your dog. Also, Hustle is the solution to slow recalls. Shouting at your dog will usually make him slow down. I mean, who wants to hurry to a person who’s shouting at them. But if you say, “Hustle” at least your dog now knows that you would like him to speed up.
Woof/Shush
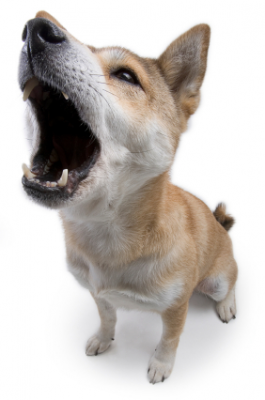
So many owners, or to be more precise, their neighbors, find excessive barking to be an intolerable problem when dogs are left at home alone. But also, many owners find excessive and uncontrollable barking to be a problem even when they are at home with their dogs. The solution is simple. Teach the dog to shush on cue. This may sound OK in theory but many owners experience huge problems trying to put theory into practice, largely because they try to teach the dog to shush when he is amped up and barking so loud that he cannot even hear the owner’s instructions. We have a better way.
First, let’s put the “problem” on cue and teach the dog to speak on command. Some may think this strange: “My dog barks so much, so why on earth would I teach him to bark more?” Well, if you have taught your dog to speak on command, you may now teach your dog to shush at times when your dog is not over-the-top with excitement and at times that are convenient to you.
Lure/Reward training always comprises the same four-step process:
1. Request 2. Lure 3. Response 4. Reward.
And so to teach your dog to speak on cue:
1. Say “Speak” 2. Lure your dog to speak, and 3. When the dog speaks, 4. Reward your dog. However, what shall se use for a lure? How about having an accomplice ring the doorbell? After six to eight repetitions of the training sequence, your dog will learn that “Speak” predicts that the door bell is about to ring and so, he will bark when you say “Speak” in anticipation of the doorbell.
Lure/Reward training is so quick and easy, we may as well teach the dog to shush at the same time. But again, what shall we use as a lure to shush the dog? Certainly, a food treat is the very best lure. A dog cannot sniff a food treat and bark at the same time. These are two mutually exclusive behaviors. Go on, try it yourself.
And so, the Woof/Shush training sequence becomes:
1. Say, “Speak”
2. Accomplice rings the doorbell or knocks on the front door
3. Dog barks at the doorbell
4. Praise your dog for barking, “Good boy! Good woofs!”
1. Say, “Shush!”
2. Waggle a piece of freeze-dried liver in front of your dog’s nose
3. Dog sniffs food and stops barking
4. Praise your dog, “Good Shush. GoooooodShush.” And then give your dog the treat.
Repeat the above woof/shush sequence a number of times and with each repetition, progressive increase the length of shush-time following each barking session by delaying giving the food treat. You may count out the length of the shush-time — “Good shush one. Gooood shush two. Goooood shush three… etc.”
Now practice on a walk, so that your dog learns to Speak and Shush in a variety of different settings.